Thursday, 13 December 2012

Week 1 Lab 2 Exercise 4

Process
Week 1 Lab 2 Exercise 4 - Ocean

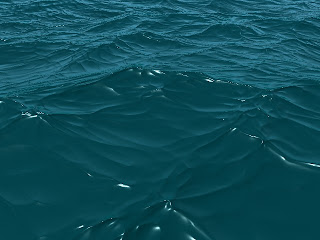
For this exercise, a step-to-step tutorial video was given to us. At first, I thought that this exercise will be difficult. However, it is quite manageable(:

To create an ocean, we use Dynamics. Choose create ocean and from there, we change things like; the settings, attributes of the ocean and we are done!

When I complete this exercise, I felt a huge achievement as if I had just complete something difficult!(: 

Tuesday, 11 December 2012

Week 3 Lab 1 Part 2


First we create a polygonal plane on the grid and we drag out a rectangle then we set the parameters. Next, we will import a image to Maya by clicking Assign new material -> Blinn -> File -> click the file icon next to Image Name and select the image we wish to import. If the image is not centered correctly on the plane, normalize the UVs by clicking Edit UVs -> Normalize.

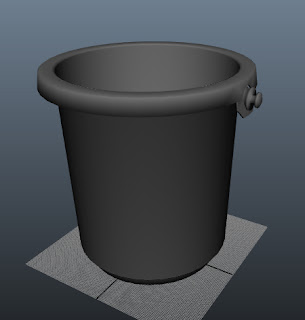
After all the moving of the handle, we create the basic shape of the bucket. CV curve tool was used to trace the shape of the bucket. Then we have to extrude and boolean it, in produce of a hole at two ends of the bucket which the handle will fit into. The last step is Soft selection manipulator to give the handle a more realistic look.

I have to say, this is the hardest exercise that I had done and also took the longest time to complete it. After much trying and consulting my friends, I have finally completed it!

Monday, 26 November 2012

Week 6


In this exercise, we are supposed to create a room to put in all our toys inside. To create the room, we start off with a cube. After setting the dimensions of the cube, we go to Face model and delete off the top, front and left-side of the cube. Then we will add in color for our room by clicking , assign a new material and click on Lambert. 

To make our room more realistic, we also created windows. To create the window, we click on Edit mesh then click on Insert Edgeloop tool. We have to insert sufficient Edgeloops so that we can cut 2 faces on the wall face for 2 windows. Right click and go into Face mode then delete the 2 faces for the windows.

Now of course, with windows, there are definitely have to be something that can be seen outside the windows. So we created, garden scenery as well! First, we create a polygon plane, setting all subdivision to 1 which will have the same size as the wall of the room. Then we rotate it to 90 degree and move the plane at a little distance outside the wall. After with are done with this, we went to search online for the garden image and save the image we want. To put in the image to the plane, we click on assign new material and then click on Lambert. Next, we Extrude the edges of the window to give it a more 3D feel.

The last step will be bringing all the toys into the room and Translate / Rotate / Scale it accordingly. To import the toys we click on File then Import.

Monday, 19 November 2012

Week 5

Process - before putting in the Photoshop image

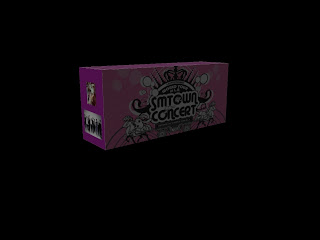
This exercise make use of Photoshop and Maya. First, we have to create the layout of the ticket booth. Star out with a cube then by the UV mapping to map the faces of the booth. This step is an extremely important step as if we did this step wrongly, we won't be able to complete the ticket booth. Hence, we have to be extra careful with this step and do it correctly.

After we create the layout of the booth, we will save the file and open it at Photoshop. In Photoshop, we just have to make use of our creativity to design our ticket booth. We can color it and also insert image in the ticket booth.

When we are done with the design of the ticket booth, we save it as a JPEG file then we will go back to Maya. In Maya, we will open the file that we had in Photoshop by right click and choose Assign New Material then click on Lambert and select the JPEG file from the folder. After this step, the design we did in Photoshop will just appear on the ticket booth and we are done!

This exercise is fun and interesting, as we get to do something different. Other than working on Maya, we can also have fun and design our ticket booth in Photoshop.

Saturday, 17 November 2012

Week 3 Lab 1 Part 1

Week 3 Lab 1 Part 1 (Phone Wire)
Phone Wire

First, we set off a straight line by using the CV Curve Tool then we create circles by clicking on NURBS Primitive and click on Circle. Select all and click on Surfaces and then click on Extrude. It will then appear as a tube. We then move out the tube out of the straight line then scale, change the rotation where the tube now will be more twisted and curved. After much scaling, our Phone Wire is done!

For this exercise, we are given a step-by-step video tutorial which is the same teaching style as the Gears exercise we did at Week 2 Lab 2 Part 2. For this exercise as long as we follow all the instructions given, we will be able to complete the phone wire model. To conclude, I find this exercise manageable as to the same reason I gave when we did Week 2 Lab 2 Part 2 exercise,  I am able to keep up with the speed of teaching as I can pause and replay the video if I don't understand a certain part. 

Sunday, 11 November 2012

Week 4 - Lab 2 : E-learning


  • Does multi-tasking give you a real or false sense of having accomplished something? 
If you can do multi-tasking, definitely you will feel a sense of having accomplished something as it shows that you are able to complete several things in one go. However, in my opinion, being able to complete several things together doesn't means that all of the things you done are in 100% best condition. Maybe you are in a rush to complete all of them so your aim is to just COMPLETE them and might not give it all your best shot. In this way, I rather do things in focus by complete each one of them individually so that I can give 100% concentration to them. By able to complete all of them in my best form, then I will feel a real sense of accomplishment. 

  • Is learning 3D and design different from learning programming, or is all learning the same?Why?
All learning is the same as we all have to have the basic learning attitude in order to learn. By saying learning attitude, I mean by focus, positive and determination, of course there is more of it but this 3 attitude are extremely when it comes to learning.

But there are two different of learning, one is the theory and the other one is practical. For theory, all we need to do is remember the contents of what we learn but practical is different. Like learning 3D and design, we all have to practice more in order to do well, not by memorizing the instructions will help us in our work. 

  • The article states that “Learning is actually a very complex operation for an individual”. Do you agree with this? Do you feel that you approach your learning in the best way – if yes, how, and if no, how can you change your work style?
Yes, I agree to this as many things have to be done when it comes to learning. For example, the condition of your mood, environment, weather etc. Even the smallest things can stop you from learning, maybe the television is playing your favorite movie and you will feel might just stop your work and watch the movie instead. 

So it takes up a lot of effort in learning, you have to be disciplined and focus when it comes to learning and every one have different style of learning. For me, I prefer to do my work by my own, plug in my earpiece and listen to music as I do my work. I won't be interrupted and I can really concentrate on my work. 

  • What are your thoughts about the last paragraph in the extract? 
s   I extremely agree the last paragraph in the extract. I think that communication is the most important factor in all kind of things. Without communication, we will fail in a lot of thing. For example, business. In business, communication plays a important factor as the seller have to communicate with the buyer to promote and convince them to buy their products without communication, is hard for both parties, the buyer have to judge by what the see of the product and the seller will have a have time to sell their products.


  • Should your lecturers also focus on your work attitude, or just leave you to sink or swim on your own? Why?
     I think that lecturers should also focus on our work attitude as students are still young, sometimes we will be lost track and if the lecturers are there for us, they can guide us to the right direction. As lecturers are mature adult, they understand things better than students hence, they can tell where we lacking of and advise us so that we can improve ourselves better. 

Saturday, 10 November 2012

Week 3 Lab 2


Train Track

To do the train track, we have to outline it first. The first step is to create a polygonal plane and after setting the parameters, we hold the right-click option and choose Assign New Material, click on lambert from the menu, next to the color option, click on the file and open the train track image provided from the source image folder. Then, normalize the UVs to centered the image correctly on the plane.

The second step is to outline the train track image by using the polygon tool. Next, extrude and bevel the train track to make it look more 3D. Then by using edge loop tool,  it will divide the train track equally so that we are able to see the lines. This step required techniques more of extrude and bevel.


The last step will be, deformers. By doing this step, I can bend the train track whichever angle I want. 
Washboard

For the washboard, the techniques used are quite similar as to the train track. It is mainly extrude and bevel. One of the step "Extrude the new faces to create the ribs.", remind me of one of the exercises we did previous, which is the Week 2 Lab 2 Part 2 (Gears), where we also have to use the exact technique (extrude). 

The more challenging part of this exercise is to align the parts together. At the start, I faced some problem in doing it, but after I consult my friend, I am able to do it.

I added in colours to the washboard by right click on the washboard then select assign new material and choose lambert then I choose the colours I want. The color I close are close to a washboard as well, to make it more realistic.